Installing a tweeter with a built-in crossover is an essential step in achieving high-quality sound in your car audio system. A tweeter with a built-in crossover is designed to filter out low-frequency signals, allowing it to focus on producing only high-frequency sounds. This results in improved sound clarity and overall better audio performance.
To install tweeters with built-in crossovers, you will need to gather the necessary tools and materials and follow a few simple steps. It is important to choose the right location for your tweeters and properly wire them for optimal performance. In this guide, we will walk you through the process of installing tweeters with built-in crossovers in your car audio system.
Why Install Tweeters With Built-In Crossovers
Tweeters with built-in crossovers offer several benefits over traditional tweeters without a crossover. One of the main advantages is improved sound quality. As mentioned earlier, the built-in crossover helps filter out low-frequency signals, allowing the tweeter to focus on producing only high-frequency sounds. This results in clearer and more accurate sound reproduction.
Another benefit of installing tweeters with built-in crossovers is their compact size. Traditional external crossovers can take up a lot of space and may not fit in every car audio setup. With built-in crossovers, you can easily mount the tweeters in tight spaces without sacrificing sound quality.
Lastly, installing tweeters with built-in crossovers simplifies the installation process and reduces the need for additional wiring. This makes it a more convenient and cost-effective option for upgrading your car audio system. So, if you want to improve your sound quality without the hassle of complicated installation, tweeters with built-in crossovers are definitely worth considering.
How To Install Tweeters With Built-In Crossovers
There are a few steps you need to follow in order to properly install tweeters with built-in crossovers:
1.Gather the necessary tools and materials
Before beginning the installation process, it is important to have all the necessary tools and materials at hand. This includes tweeters with built-in crossovers, speaker wire, wire cutters/strippers, electrical tape or heat shrink tubing, screwdriver, and possibly a drill if you need to create new mounting holes.
It is also recommended to have some extra wiring in case you need to make adjustments or modifications during the installation process. Having all the necessary tools and materials at hand will ensure a smooth and efficient installation.
2.Choose the right location for your tweeters
Choosing the right location for your tweeters is crucial for optimal sound quality. Ideally, they should be mounted close to ear level for the best sound dispersion. You also want to make sure they are securely mounted and won’t vibrate or move while driving.
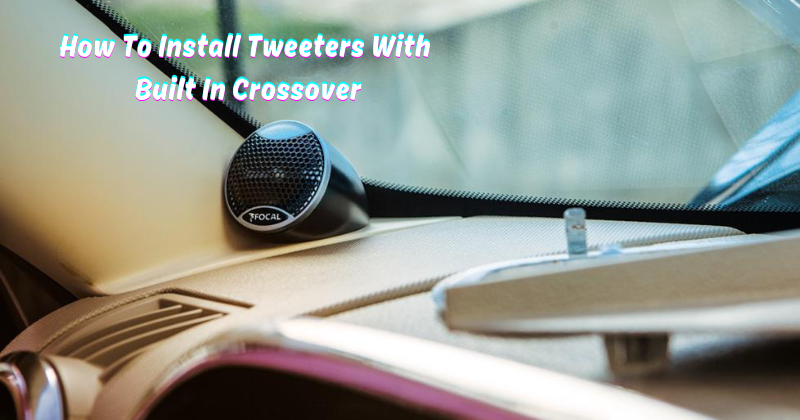
Some popular locations for tweeter installation include the A-pillars, door panels, dashboards, or in custom kick panel enclosures. It is recommended to test out different locations before finalizing the installation to find the ideal spot for your specific car audio setup.
Once you have chosen the location, make sure to properly clean and prepare the surface for mounting to ensure a strong and secure hold.
3.Remove the door panel or speaker grille to access the factory speakers
In most cases, tweeters are installed alongside existing factory speakers. To access these speakers, you will need to remove the door panel or speaker grille. This can usually be done by gently prying off the panel with a pry tool or screwdriver.
Make sure to do this carefully to avoid damaging any clips or wires attached to the panel. If necessary, refer to your car’s manual for specific instructions on removing the door panel or speaker grille for your particular make and model.
4.Disconnect and remove the factory speakers
Once you have removed the door panel or speaker grille, you will need to disconnect and remove the existing factory speakers. This can usually be done by unscrewing them from their mounting location or gently pulling them out if they are held in place with clips.
Make sure to note which wire is connected to the positive and negative terminals of the speaker so you can properly connect your new tweeters. It is also recommended to test the speakers before completely removing them to ensure they are functioning properly.
5.Mount the tweeters in their chosen location
Using the appropriate mounting hardware, secure the tweeters in their chosen location. Make sure they are firmly attached and won’t move or vibrate while in use. If necessary, you may need to drill new mounting holes or use adhesive tape for certain locations.
Before fully securing the tweeters, make sure they are facing towards the listener for optimal sound dispersion. You may also want to test them out before finalizing their placement.
Now that your tweeters are securely mounted, it’s time to connect them to the crossover and test their sound quality.
6.Run wiring from the tweeters to the crossover input terminals
Using speaker wire, run a length of wire from each tweeter to the input terminals on the built-in crossover. Cut and strip the ends of the wires as needed and make sure they are securely connected to the terminals.
It is important to keep the positive and negative wires consistent with their corresponding input terminals on the crossover. This will ensure proper sound reproduction and prevent any potential damage to your tweeters.
7.Connect the crossover output terminals to the positive and negative wires of your car’s speaker wire
Using more speaker wire, connect the output terminals of the crossover to the positive and negative wires of your car’s speaker wire. Make sure to properly strip and connect the wires to ensure a secure and stable connection.
It is recommended to use electrical tape or heat shrink tubing to cover any exposed wiring for added protection. Again, make sure to keep the positive and negative wires consistent with their corresponding output terminals on the crossover.
8.Test the tweeters to ensure they are working properly
Before fully securing all the wiring, it is important to test the tweeters to make sure they are functioning correctly. Turn on your car’s audio system and play some music with a good range of high frequencies.
Adjust the volume and equalizer settings as needed to find the optimal sound quality. If the tweeters are not producing any sound or there is distortion, double check all connections and wiring before proceeding.
9.Replace the door panel or speaker grille and secure it in place
Once you have confirmed that your new tweeters are working properly, replace the door panel or speaker grille. Make sure to carefully reconnect any clips or wiring that were removed.
Secure the panel or grille in place and test it by gently pressing on it to ensure it is firmly attached. If necessary, make any final adjustments to the tweeters’ placement before fully securing the door panel or speaker grille.
10.Enjoy your improved sound quality!
Congratulations, you have successfully installed new tweeters in your car audio system! Enjoy the enhanced sound quality and clarity that they provide.
Be sure to properly maintain and care for your tweeters to ensure their longevity. Regularly check the wiring and connections to make sure everything is secure and functioning correctly.
With the right tools, materials, and knowledge, installing tweeters in your car can be a simple and rewarding process. Experiment with different locations and settings to find the perfect sound for your unique setup. Happy listening!
Mistakes that you should avoid
- Not properly preparing the surface for mounting, resulting in weak or unstable tweeter placement.
- Disconnecting the wrong wires or not keeping track of positive and negative terminals during installation, which can lead to poor sound quality or even damage to your tweeters.
- Forgetting to test the speakers before completely removing them, resulting in potential issues with your audio system.
- Not testing the tweeters after installation, which can lead to an unsatisfactory sound experience.
- Rushing through the installation process and not taking the time to properly secure all wiring and connections, leading to potential issues in the future.
Remember to take your time and follow these steps carefully for a successful tweeter installation. Happy installing! So go ahead and upgrade your car’s audio system with new tweeters for a more enjoyable driving experience.
Should i install them myself or hire a professional?
This ultimately depends on your level of experience and comfort with car audio installation. If you have never installed tweeters before or are not confident in doing it yourself, it is best to seek the help of a professional.
However, if you have some knowledge and experience with car audio systems and feel comfortable following instructions and using tools, installing tweeters can be a DIY project. Just make sure to research and gather all necessary materials beforehand and take your time during the installation process.
Remember, proper installation is crucial for optimal sound quality and avoiding any potential damage to your car or audio system. If you are unsure about any step of the installation, it is always better to seek professional help rather than risking costly mistakes. Ultimately, the choice is yours and it’s important to do what you feel most comfortable with. So choose wisely and enjoy your enhanced audio experience!
FAQs
Do I need to replace my current car speakers in order to install tweeters?
No, you do not necessarily need to replace your current car speakers. Tweeters can be added as an additional component to enhance high frequency sound reproduction.
Can I install tweeters in any type of car?
Yes, tweeters can be installed in any type of car as long as there is enough space and the necessary wiring connections are available.
Do I need any special tools for installing tweeters?
You will need basic tools such as screwdrivers, wire cutters/strippers, and electrical tape. Depending on your car’s make and model, you may also need additional tools such as panel removal tools or a drill for mounting the tweeters.
How long does it take to install tweeters in a car?
The time it takes to install tweeters can vary based on your level of experience and the complexity of your car’s audio system. On average, it can take anywhere from 30 minutes to 2 hours.
Can I move my tweeters around after installation?
Yes, you can adjust the placement of your tweeters after installation to find the best sound quality for your car’s audio system. However, make sure to secure all wiring and connections before testing or moving the tweeters. Overall, it is recommended to choose a suitable location during installation and avoid frequent adjustments once everything is secured in place.
Conclusion
Upgrading your car’s audio system with tweeters can greatly improve the overall sound quality and enhance your listening experience while driving. With the right tools, materials, and knowledge, installing tweeters can be a simple and rewarding DIY project.
Remember to take your time, carefully follow instructions, and test the tweeters before fully securing all wiring. If you are unsure or uncomfortable with any step of the installation, seek professional help to avoid costly mistakes.
Enjoy your new and improved audio system and happy driving! Happy tinkering! Enjoy the process and have fun experimenting with different tweeter locations for optimal sound quality.