Most cars nowadays come with basic audio systems, but for those who enjoy quality and loud music, a car stereo upgrade is a must. However, installing a new car stereo can be quite complicated and time-consuming if you don’t know what you’re doing. Luckily, you can save some money by rewiring your old car stereo instead of buying a brand new one.
This process may seem daunting at first, but with the right tools and knowledge, rewiring a car stereo can be a straightforward and rewarding experience. In this guide, we will provide you with step-by-step instructions on how to rewire your car stereo, so you can enjoy high-quality sound in your car without breaking the bank.
Why Rewire?
Before we dive into the process of rewiring a car stereo, it’s essential to understand why this may be necessary. There are a few reasons why you might want to rewire your car stereo:
- Your old car stereo has stopped working
- You want to upgrade to a newer model
- You want better sound quality or more features than your current system offers
No matter the reason, rewiring your car stereo can save you money and allow you to customize your car’s sound system according to your preferences.
What You’ll Need
To successfully rewire your car stereo, you will need the following tools:
- New car stereo unit
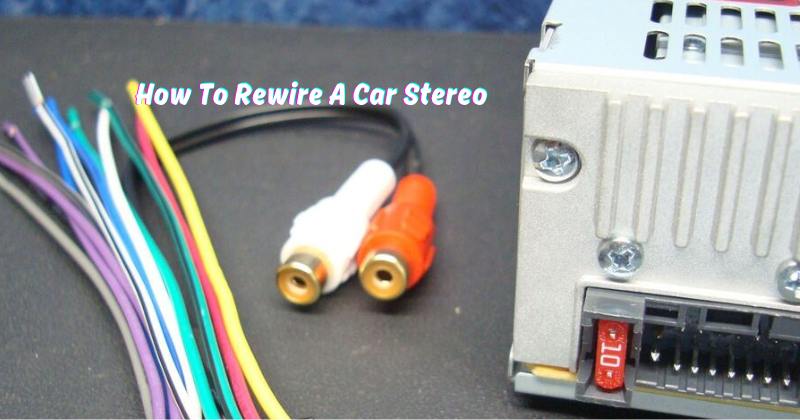
- Wiring harness adapter
- Screwdriver set (flathead and Phillips head)
- Wire cutters/strippers
- Electrical tape
- Crimping tool (optional)
Before starting the rewiring process, make sure you have all these tools on hand. It’s also a good idea to read the manual for your new car stereo and familiarize yourself with its wiring diagram.
Step-by-Step Guide
Now that you have everything you need, it’s time to start rewiring your car stereo. Follow these steps for a smooth and successful process:
Disconnect the negative battery cable
The first step in rewiring a car stereo is to disconnect the negative battery cable. This is an essential safety precaution to avoid any electrical accidents while working on the wiring. Locate the negative terminal on your car battery and use a wrench to loosen and remove the cable. Make sure to secure it away from the battery, so it doesn’t accidentally come into contact with it.
Also, before proceeding with any further steps, it’s important to read and understand the wiring diagram provided in your car stereo’s manual. This will help you identify the different wires and their functions, allowing you to properly connect them during the rewiring process.
Remove the old stereo unit
Next, you’ll need to remove the old stereo unit from your car. Use a screwdriver set to unscrew any bolts or screws holding the stereo in place. Gently pull out the stereo and unplug all the wires connected to it. Make sure to keep track of which wire goes where by labeling them with masking tape or using a pen and paper.
Plus, it’s also a good idea to take this opportunity to clean the area where the stereo was installed. This will ensure that your new stereo fits snugly and looks neat in your car.
Connect the wiring harness adapter
The next step is to connect the wiring harness adapter to your new car stereo. The adapter serves as a bridge between the wires in your car and the ones on the back of the stereo. Simply match the colors of the wires from the adapter to those on your new stereo, and use a crimping tool or electrical tape to secure them together.
If you’re unsure about how to properly connect the wiring harness adapter, refer to your car stereo’s manual for guidance. Once connected, plug in the adapter into the corresponding port on your new stereo.
Install the new car stereo
With the wiring now in place, it’s time to install your new car stereo. Carefully slide it into the slot and secure it with any screws or bolts removed from the old unit. Double-check all connections and make sure everything is properly plugged in before proceeding.
Once the new stereo is in place, reconnect the negative battery cable and turn on your car to test it out. If everything looks and sounds good, congratulations – you have successfully rewired your car stereo!
How much does it cost?
The cost of rewiring a car stereo will vary depending on the type and brand of stereo you choose, as well as any additional tools or accessories you may need. However, compared to buying a new car stereo and paying for installation services, rewiring can save you a significant amount of money.
Additionally, the process itself is relatively simple and can be done at home, so you also save on labor costs. Just make sure to follow the steps carefully and take your time to ensure a successful installation.
Benefits of rewiring a car stereo
Aside from the cost savings, there are other benefits to rewiring your car stereo:
- Customization: With a rewired stereo, you have more control over the sound quality and features compared to a factory-installed system.
- Upgradability: If you decide to upgrade your car stereo in the future, the rewiring process will be easier and less time-consuming.
- Increased value: A well-installed, customized car stereo can add value to your vehicle if you decide to sell it.
- Personal satisfaction: Rewiring your car stereo yourself can be a rewarding experience, especially if you’re someone who enjoys DIY projects.
- Better sound quality: With a properly wired stereo, you can enjoy improved sound quality and clarity in your car audio system.
- Flexibility: You can choose from a variety of car stereo models and brands, giving you more options to find the perfect fit for your needs and preferences.
Tips and Tricks
Here are a few extra tips to keep in mind when rewiring your car stereo:
- Take your time: Rushing through the process can lead to mistakes, so make sure to take your time and follow each step carefully.
- Label everything: As mentioned earlier, labeling wires and parts can help you stay organized and avoid confusion during the installation process.
- Double-check connections: Before reconnecting the battery and finishing up, double-check all your connections to ensure they are secure and in the correct ports.
- Read the manual: Don’t be afraid to consult the manual for your new car stereo or search online for additional resources if you’re unsure about any step.
- Safety first: Always disconnect the negative battery cable and wear protective gear, such as gloves and safety glasses, when working with electrical components.
FAQs
Can I install a new car stereo myself?
Yes, you can. Rewiring a car stereo is a relatively simple process that can be done at home with the right tools and instructions.
Do I need any special skills or knowledge to rewire my car stereo?
While basic knowledge of electrical wiring is helpful, it’s not necessary as long as you follow the steps carefully and refer to the manual or other resources when needed.
How long does it take to rewire a car stereo?
The time needed for rewiring will vary depending on your experience level and the type of car stereo, but it can typically be done in a few hours. However, it’s always better to take your time and not rush through the process.
Conclusion
Rewiring a car stereo may seem like a daunting task, but with the right tools and instructions, it can be a simple and rewarding experience. Not only can it save you money, but it also allows for more customization and flexibility in your car audio system.
Just make sure to follow each step carefully, take your time, and prioritize safety to ensure a successful installation. And don’t forget to enjoy your newly wired car stereo! So, if you’re looking to upgrade or replace your car stereo, consider rewiring it yourself for a more personalized and cost-effective option. Happy wiring!
